Top: Position trommel screen so overs are coming off the conveyor near the composting side of the yard (right) and fines are near the retail space (left).
Ted Dirkx
A key to a successful composting business is managing fixed operational costs and producing quality end products people want to buy. Both of these objectives can be met by the layout of a composting facility and managing how material flows through the yard.
Layout determines how efficiently material is handled and can significantly impact the quality of the end products. A good layout minimizes material handling and helps control outside factors, like moisture, that can impact maturing and cause odors. And while the overview of how a composting facility is constructed can seem pretty basic, it’s the little details that matter. Stops #1-#6 in the article correspond with numbers 1-6 in the site layout graphic below.
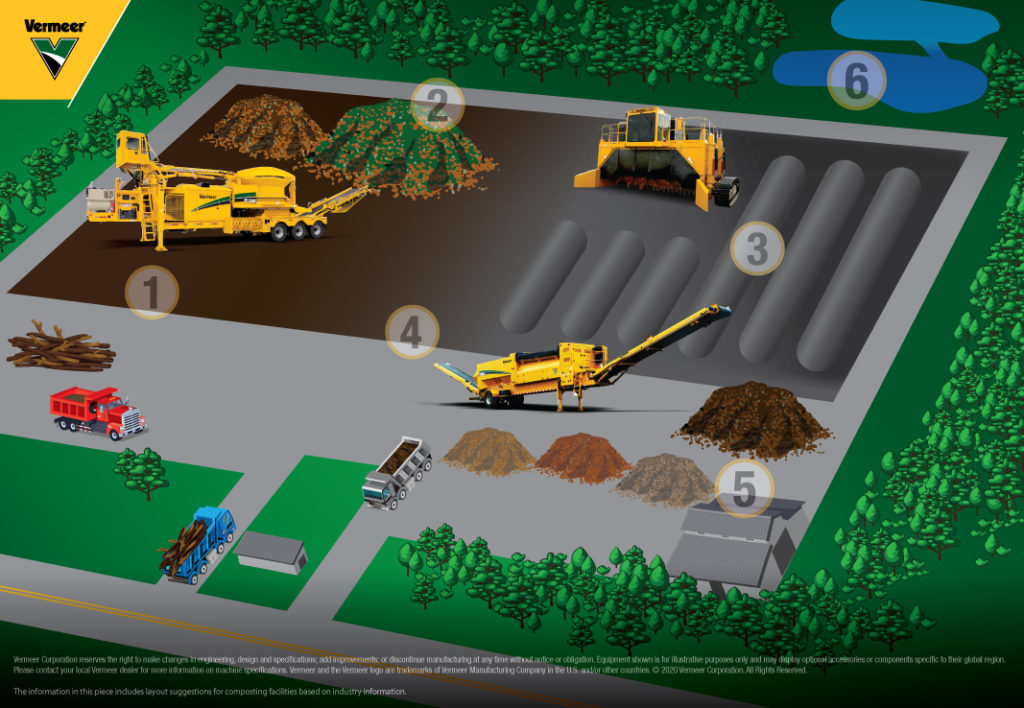
1. Drop-off; 2. Incoming material and grinding; 3. Composting; 4. Screening and finishing; 5. Retail; 6. Drainage pond and perimeter.
Stop #1: Drop-off Area
How and where incoming organic waste is accepted is a critical detail. Because composting facilities typically charge tip fees, the first thought is how to make tipping more convenient for people to dump and leave. So they put the drop-off area just beyond the weigh station. And if the site has a retail yard to sell compost and/or mulch, it also wants to have that area near the entrance of the facility. Having both raw feedstocks and finished products up front requires a lot of movement, and extra time spent moving material can have a significant impact on fixed operating expenses, reducing profit margins.
The more efficient place to accept incoming material is closer to the grinding area, so as it’s processed, it can gradually move toward the front and be ready for retail. Controlling the flow from where the material is received can significantly reduce the number of times it’s moved with loaders, helping to save on equipment costs, fuel and labor. The other advantage of having the drop-off area away from the front of the facility is to reduce the possibility of incoming material accidentally getting mixed in with finished material waiting to be sold.
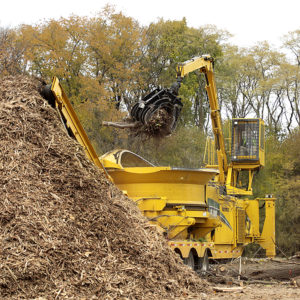
To fully use the grinder throughput potential, materials should be able to be pushed from the drop-off area to the grinder. Discharge should be pointed in the direction of the composting area. Photos courtesy of Vermeer Corporation
Stop #2: Incoming Material And Grinding Area
Separate from the drop-off area, but right alongside it, is where stacked raw material is staged to be run through a grinder. Only trained employees should have access to this area of the operation.
What is important at Stop #2 is material flow and efficient handling. Grinding is one of the highest cost functions of any operation so it’s essential to fully use the grinder throughput potential. Materials should be able to be pushed from the drop-off area to the grinder, and the discharge should be pointed in the direction of the composting area.
Stop #3: Composting Area
In the composting area, look at operations from the ground up, starting with the base and then looking at how the area drains storm water runoff. A dirt pad may be the most economical option, but it’s not going to be the most efficient or create a higher quality compost. For example, when dealing with wet material, like food waste, mulch and rain, dirt pads can quickly get sloppy and potentially give off an odor. Concrete or asphalt pads often offer the best surface for quality compost production.
Another critical detail is to optimize drainage in the composting area by having a slope so there are places for water to go after a heavy rain, for example. To keep water from becoming trapped between compost rows, windrows should run parallel with the slope of the pad. Spacing of windrows should be kept to a minimum to help maximize usage of the composting pad.
Stop #4: Screening And Finishing Area
Finished product screening should be positioned between the composting area and retail space to help minimize the material handling involved. Position trommel screen so overs are coming off the conveyor near the composting side of the yard and fines are near the retail space. Simple steps like this help reduce cross contamination of material, which in turn results in a higher quality end product.
Stop #5: Retail Area
Setup and layout of the retail space depends on the customer base. If you’re selling in bulk, piles are okay. If products are being bagged, position bulk material as close as possible to help minimize cycle times. Barriers should be put in place to minimize contaminates, like plastic and paper, from blowing into the retail area. Drainage and coverage should also be considered to keep materials dry and to maintain good quality.
Stop #6: Drainage Pond And Perimeter
Constructing a series of drainage ponds on the low side of the property near the composting rows serves to catch runoff and clean it. The first pond collects runoff while each additional pond helps slow the flow and give sediments a chance to separate. These ponds are also a good resource when the compost’s moisture levels are low. Running a pump and sprinkler is a cost-effective way to bring moisture content back to optimal levels.
Establishing a barrier of trees or fencing to catch light plastic contaminates can be a good idea and is often required by state and local officials. Fencing is almost always required, but trees can offer an additional barrier of protection.
As your operation grows and evolves, the site layout and flow of material needs to be questioned and changes will likely be necessary. Operating on the basis of continuous improvement will guide you to a more efficient composting facility layout.
Ted Dirkx is Vermeer Corporation’s Recycling and Forestry Sales Manager.
How To Estimate Operating Costs
A 5-part Compost Business Management series in BioCycle CONNECT by Craig Coker in 2020 included an article titled “Composting Facility Operating Costs Estimates.” Coker, Senior Editor of BioCycle CONNECT, noted operating costs are “all the costs you will incur to make a cubic yard of finished compost/soils product. Normally those costs include some factor for amortizing the capital investment in the facility, plus the cost of money acquired to finance that capital. But for the purposes of this article, operating costs will be defined as non-capital related costs, e.g. fuel, labor, electricity, and maintenance.
“For a new facility, those costs can be estimated with a time-and-motion projection. For existing facilities, operating expenses can be measured in a similar manner along with detailed cost accounting of equipment costs. As composting is essentially a materials handling exercise, it takes a certain amount of time at a certain cost, to perform each task in the compost manufacturing process. The time to perform each task is estimated (or measured in existing facilities), and the cost of each task is defined by the loaded labor rate and the machine rate.”
Coker’s article is a helpful complement to Ted Dirkx’s article on composting facility layout. It includes tools to calculate factors such as time-and-motion projections of operating costs, loaded labor rates and machine rate.


